Sunday, November 23, 2025
Snowglobe shaker cardtutorial
https://www.pinkfreshstudio.com/blogs/card-blog/scenic-shaker-card-inside-tied-with-cheer?fbclid=IwdGRjcAOQj4djbGNrA5COVGV4dG4DYWVtAjExAHNydGMGYXBwX2lkDDM1MDY4NTUzMTcyOAABHiePGmP2W-CS8a4xeWB-xI0lZjA_yLHthX4EheoN-4VDbbBU8NgKY8KNPKD0_aem_iF5RMcfNV_GgmTQLNM6h5w
Saturday, February 22, 2025


Friday, February 7, 2020
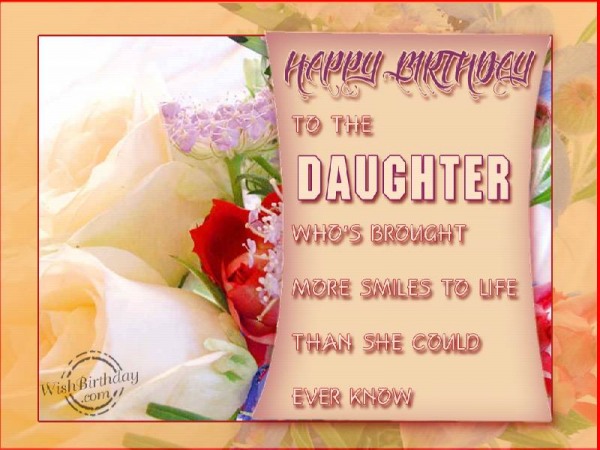
Sadies 1st Valentines Card

Inside it says
100 hearts would be too few
To carry all my love for you.
Love Grandma and Grandpa
Monday, July 25, 2016

How to make a paper bow using the
We Are Memory Keepers Envelope Punch Board

Step 1: Cut (2) 6″ x 1″ strips. Line up the strip at the 3-inch mark on the punch board and punch notches from both sides of each strip.
Step 2: Adhere two sides of bow (wrong sides together) with liquid adhesive. This acts as a lining for your bow as well as adding stiffness to maintain it’s shape.
(Note: You can also reverse step 1 & 2 punching out the center after the 2 strips are adhered together).
Step 3: Line up the center of the bow at the 3-inch mark, punching each side on both ends.
Step 4: Gently curl each end toward the center. I used a pencil to gently curl it.
Step 5: Adhere the ends in the center with a bit of liquid adhesive or hot glue. I chose to staple the center afterwards for extra stability.
Step 6: Cut a 4.25″ x 1″ strip for the ribbon tails. Center the strip in the punch and notch each end as shown.
Step 7: Line the strip at the 2-1/8″ mark and notch each side of the ribbon tail in the center.
Step 8: Add liquid adhesive or hot glue to center of bow and adhere bow portion to ribbon tail.
Step 9: Thread twine through button using an embroidery needle, add a bit of glue to center of button and wrap button & twine around center of bow, knotting on the back.
Step 10: Use finished 3-D bow to embellish your favorite DIY or Home Decor project.
**Thank You http://pebblesincblog.com/
**Thank You http://pebblesincblog.com/
Tuesday, June 7, 2016

Friday, April 8, 2016


Monday, December 14, 2015


Thursday, August 27, 2015
Thursday, August 13, 2015
Potty Training Your Puppy
A puppy can hold it for one hour for every month of age plus one hour. So if your dog is 2 months old they should be able to hold it for 3 hours. ie: If your puppy is 2 months old, you should take him/her to go potty every 2 1/2 to 3 hours. Start by taking your puppy potty 2 hours after their last pee. Make sure to say 'go potty' or 'go pee' every time you take your puppy to the potty area. Repeat the command until your puppy is finished their business. Once your puppy is done going potty you can give him/her attention and reward him/her with a doggie treat. At this young stage I like to give my puppy tiny pieces of cheddar cheese 1/4 the size of my baby fingernail. Give them some supervised play time and praise him/her every time. After you are convinced that your puppy is doing good you can start to expand their play area one room at a time. If your puppy doesn't go potty within five minutes, put him/her in his/her kennel. Wait 15-20 minutes and try it again. Repetition is the key.
Don't get mad if your puppy has an accident, just put them on their pee area with their poo , say the command ie:'potty' . Never rub their nose it it or yell at your pet.
Friday, July 17, 2015


Thursday, July 2, 2015


Saturday, June 20, 2015


Tuesday, February 3, 2015
Monday, December 22, 2014
Monday, November 3, 2014
Sunday, December 15, 2013

Sunday, October 27, 2013

Sunday, April 7, 2013
ARTIST TRADING CARD
GYPSY SWAP
GYPSY SWAP


For those who don't know, ATC's are 2 1/2" by 3 1/2".
They fit in a clear ATC sleeve.
Here I used Tattered Angels Glitter Mist (candy apple red and walnut gold)for the background.
I stamped one of the flowers from the Inkadinkado stamp set # 97633.
Then I cut out a piece of glitter paper 2 1/2" by 3 1/2" and cut it in half diagonally and used one half for the atc.
I used a Martha Stuart Punch along the bottom of the glitter paper to form the loops.
Then I glued a piece of gold threaded wool to the edge of the glitter paper.
I cut the face out with a circle punch (1 1/4" stampin up punch) and the scallop circle was cut out of black glitter paper (1 1/2" stampin up scallop punch)
Then I added a piece of black leaves or flowers from a spool of Deco-Borders self-stick flock.
I added the fortune telling coin with a pearl or jewel in the middle.
The peaces of feather are pulled from the base of a peacock feather.
I haven't been crafting in awhile and it sure was fun making these ATC's
Thursday, October 11, 2012
Saturday, November 19, 2011

Tuesday, August 30, 2011
CDAC PROGRESSIVE FREEBE CHALLENGES
I received some free digital stamps from crafters digital art center and made a few cards. This was quite fun.


Wednesday, May 25, 2011
Stamp TV's Glitter it up card using Perfect Pearls
Measurements:
Bubblegum Pink card base- 4 1/4" X 11", scored at 5 1/2" and folded in half
White layer- 3 7/8" X 5 1/8"
Black Onyx layer- 3 3/4" X 5"
Focal Image Black Onyx- 3 1/4" X 3 1/4"
Bubblegum Pink focal image layer- 3 3/8" X 3 3/8"
White focal image layer- 3 1/2" X 3 1/2"
Scraps for greeting
Supplies:
Stamp set- Springtime Silhouettes
Ink- Perfect Medium, Memento Tuxedo Black
Card Stock- GKD Bubblegum Pink, Black Onyx and White
Nestabilities classic ovals large and small, Perfect Pearls Metallics Kit, Red Star Sakura Glitter Pen, Tonic Ticket Tag punch, Forest Branches Cuttlebug Folder, 1/4" Pop dots, Adhesive, Black Brads
Saturday, July 3, 2010
Sunday, February 28, 2010
Sunday, September 20, 2009
Diaper Cake

I helped my daughter make this diaper cake for her friends baby shower. We added the card on the top. It was easy and tons of fun to make!
Saturday, September 12, 2009
Pearlex on Black

I used black glossy paper for this card with green, blue and gold powder. I used the same heat embossed technique as for the card below.I colored the humminbird image with chalks.
Pearlex Heat embossed

I made this card for a friends birthday. It was hard to give away because I loved the way it turned out. I put some glue onto glossy cardstock then added a few colors of pearlex (I think it was gold bronze and copper)and stippled it around. Then I used my heat tool to bubble it up until it didn't bubble anymore.The edges were outlined with a gold krylon pen. I colored the stamped image with sakura glitter gel pens and added a bow for the finishing touch.
Friday, September 11, 2009
Autumn Blaze

Here the theme was to make a card from something that I found outside.The backgroud paper is Cardstock with Ranger Distressed Inks. To distress paper I Crumpled paper, smoothed it out, rubbed ink directly from pad to the paper, layered using 3 colors,then sprayed with water and let dry.
I glued sand on the frame around the stamped image. Then added sunflower seeds and the finishing touch was a few Peragrin Falcon feathers from a Juvenille that had visited our birdbath almost every morning that summer. Card and Keepsake in one!
I glued sand on the frame around the stamped image. Then added sunflower seeds and the finishing touch was a few Peragrin Falcon feathers from a Juvenille that had visited our birdbath almost every morning that summer. Card and Keepsake in one!
Christmas Card with Gift Card Holder

Here I made a christmas card with an insert inside to hold a gift card. I put some different colored chalks on a scalloped circle then stamped the image over top with clear versamark. I took a tissue and rubbed it over the image for the finishing touch.
I'm Back!

I've been neglecting my blogging for a year! It's time I added everything that I have done during that time. I'll try and remember all the cards and see if I can put them in order of month.
After my birthday last year I went to a monthly 'Just Stampers' meeting. We made cards which incorporated stamping on vellum. It also included some glitter techniques. I found it very messy with glitter everywhere, lol. It was great fun! We also made a vellum card which I enjoyed even more.
Sunday, September 21, 2008
Birthday cards Aug15, 2008 From my Just Stampers Friends
Each of these cards are beautiful and unique, I have wonderful friends!
 This card is from Helen Froese.
 This card is from Susan McKay
 This card is from Jackie Taylor.
 This card is from Helen Froese.
  This card is from Susan McKay
 This card is from Jackie Taylor.

Tuesday, July 8, 2008
Prisma & baby oil vs. Prisma veri thins & mineral spirits

I was over at my friend Susan's house again today and we made this lovely card. Here I used Prismacolor pencils and baby oil. I was very happy with the result.

Susan gave me another image of the tulips to do at home and I tried using my Prisma Verithin pencils with mineral spirits. I had to press much harder with the verithin pencils and when I tried blending it with mineral spirits the top layer of CS started coming off. The result wasn't too bad but I'd suggest not to use the verithin pencils with the gamasol.
Wednesday, July 2, 2008
'Pull out Tag Cards'


I went over to a friend's house and she showed me how to make thes beautiful cards. I stayed for lunch and we made the day of it. We had tons of fun!
This 1st card has a light crackle finish to it. I also used watercolor pencils and 'Twinkling H20's' for the 1st time and now I'm hooked!


This second card was to help me jog my memory so I wouldn't forget how to make it again. I can't wait to make another one with a housemouse stamp!
Subscribe to:
Comments (Atom)